How to Curve a Soccer Ball (3 Step-by-Step Methods)
Whether you’re putting in a wicked bending cross, swerving the ball around the keeper and into the back of the net, or trying to bend the ball into the path of a teammate…
Learning how to curve a soccer ball is an important skill to master.
In every match, many situations will appear where it would be useful (or even essential) to curve the ball. So it’s crucial all players are spending time on the training ground learning how to do it.
Since there are several ways to do it, it’s going to take focused and dedicated practice developing your kicking technique to curve the ball.
To make things easier for you, I’ve come up with step-by-step guides to teach exactly how you can ‘bend it like Beckham’.
Here’s how…

How to Curve a Soccer Ball 3 Ways:
a. Free Kicks or Corners (Inside of Your Foot)
In both of these scenarios, the ball is obviously stationary.
This makes it a lot easier to strike the ball because you can take time to position yourself correctly and then take your time on the run up.
Whether you’re swinging the ball in to your teammate from a corner or setting them up from a free kick, the kicking technique is identical as a shot on goal.
Step #1 - Position Yourself for the Run Up
Once you’ve placed the ball down, take a few steps back so you have a short run up to the ball.
Three strides should do it.
For a corner, you should approach at an angle of approximately 45 degrees as this will enable you to curve it into the box with ease.
If you run straight at the ball (or with too much angle), it will be much harder to control.
With a free kick, you may want to approach at a slightly larger angle depending on how much spin you want to put on the ball.
If you’re a right-footer, approach from the left side of the ball.
Vice versa for a left-footer.
Step #2 - Set Yourself Up to Kick the Ball
As you stride in to kick the ball, make sure to plant your standing food firmly next to the ball ball before making contact.
This will give you the stability you need to aim the ball.
Plant your foot facing slightly towards the direction you intend for the ball to go.
If you plant your leg and your foot / knee is facing the wrong direction, you’ll quickly see that this makes striking the ball inaccurate and uncomfortable.
When you set your standing foot, make sure it’s close enough to the ball that you don’t have to stretch to reach it and far enough away that your standing foot doesn’t get in the way of your cross or shot.
As you practice more and more, you’ll soon figure out the perfect distance.
Step #3 - Align Your Body
As you go to strike the ball, your standing foot should be firmly planted next to the ball and your body should be learning slightly to the side you want the ball to end up.
For example, if you want the ball to curve to the left and you’re using your right foot, your body should be leaning to the left when you go to kick the ball.
To help with balance, your arms should naturally raise to your sides to give you extra stability and power during the kick.
Step #4 - Strike the Ball
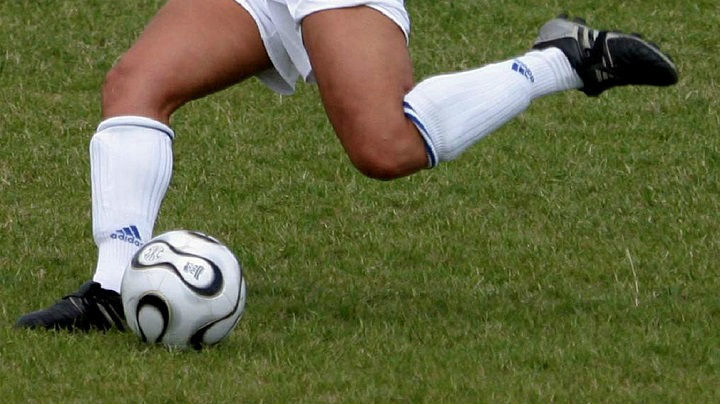
Now that you’ve set yourself up correctly, strike the ball with the interior of your foot to add curve to the ball during flight.
(Remember this is for crosses or free kicks with the inside of your foot.)
When making contact, hit the ball with the area of your foot directly after your big toe.
With time and practice, you’ll see that if you hit the ball too near your heel or your toes, the ball will be nearly impossible to control on your shot or cross.
“What part of the ball should you aim to hit?”
Well, if you’re kicking with your right foot, you want to hit the bottom right part of the soccer ball as this will enable you to curve it to the left.
To curve the ball right, use your left foot and strike the lower left side of the ball.
Next…
To add more elevation, hit the ball further down to increase the height.
However, if you kick the ball too low, the ball will sail over the top of the goal or over the heads of your teammates waiting in the box.
For the more advanced players - if you want the ball to go over the wall before dipping back down, lean slightly forward as you hit the ball from underneath.
Step #5 - Follow Through
While your standing foot should remain fixed to the floor, the rest of your body should move with the motion of the cross or shot.
Make sure to follow through with your striking foot in the direction that you kicked the ball as this will improve the accuracy and is more natural than breaking off your swing halfway through the motion.

b. Free Kicks (Outside of Your Foot)
Kicking the ball from free kicks with the outside of the foot was made famous by Roberto Carlos with his physics-defying shots that would curve around the wall with power and accuracy.
It’s a much tougher skill to master than using the inside of your foot.
Since no one uses this outside-of-the-foot technique for corners, we’ll focus solely on using this technique for free kick scenarios.
Step #1 - Approaching the Ball
Unlike setting up on an angle when you’re striking the ball with the inside of your foot…
Using the outside of your foot demands that you start you approach straight behind the ball with the goal lying directly in front of you.
Due to the curve you’re expecting, aim slightly to the side of the goal.
This will allow the ball to curve back if you strike it cleanly and accurately enough.
Also, you may want to extend your run up. To generate a deadly curve on the ball with the outside of your foot requires a lot of power.
Step #2 - Place Your Standing Foot Correctly
Just like the first curve we talked about, planting your standing foot correctly next to the ball goes a long way to determining your accuracy.
But this time when planning to use the outside of your boot, you want to place your standing foot approximately 1 foot behind the ball and slightly to the side.
You’ll know if you got it right by how accurately your kick turns out.
If you place your foot too far from the ball, you’ll need to stretch for it which will result in a loss of power and accuracy.
And if your foot is too close, it will likely impede the path of your striking foot.
Step #3 - Strike the Ball
Now that you’ve completed your run up and planted your standing foot, it’s time to strike the ball.
Running directly at the ball, connect with the outside of your foot while aiming slightly for the outside of your target knowing you’ll curve the ball.
The ideal spot to strike the ball is with the spot on your foot directly behind your smallest toe.
If you do this correctly, your striking foot will come across your body and the ball will curve.
Assuming that you’re kicking with your right foot, aim to make contact with the ball on the bottom left of the ball or even in the centre of it.
Step #4: Follow Through
To get as much curve as possible, let your striking leg naturally follow through once you’ve hit the ball.
If you’re using your right foot and have correctly connected with the outside of it, your leg should move to the left and rise up slightly in front of you.
While this happens, your left arm will naturally come down to give you more power.

c. How to Curve a Soccer Ball on the Move
While curving a stationary ball is already a hard enough skill to master, perfecting your delivery or shooting technique on a moving target is much harder.
But, it’s worthwhile to practice for the benefits you’ll gain during play.
Here are some things to keep in mind:
Step #1 - Judge Your Surroundings
The first thing you must do is be aware of what’s currently going on around you.
Do you have time to attempt a cross or shot?
If so, Is there space to do it?
If not, can you take a touch to gain yourself a little extra space to make it happen?
Sometimes it’s better to keep things simple rather than taking the risk of losing the ball in a promising area of the pitch.
Having the decision making skills to understand when the right time is to attempt to curve the ball is just as important as being able to execute the technique.
Step #2 - Look Up and Pick Your Target
If a chance does arrive to put in a cross, look up quickly and predict where your teammate is and will be, whether they’ll make a run to the near or far post, and how much power and curve you should put into striking the ball.
This is a lot to think about in the heat of the match, but it goes a long way to ensuring your kick will result in a goalscoring opportunity.
Once you’ve judged where to place it, drop your attention to the ball and focus on the strike.
Step #3 - Striking the Ball on the Run
If you’re sprinting along the touchline with the ball ahead of you or you’ve just dribbled past the opposition’s full back...
You’ll often be left with no other option than to put in a cross while on the run.
In this scenario, it’s best to slow down a bit (if possible) as this will help improve the accuracy of your cross of shot on goal.
Place your standing foot slightly behind the ball and then wrap your foot around it so that the ball curves away from the keeper.
Step #4 - Power or Accuracy?
If a shooting opportunity does arrive, you need to decide whether to smash the ball with all the power you can gather or whether you should sacrifice some power and finesse the ball past the keeper instead.
Curving the ball accurately can help you place the ball around the keeper, but if you don’t hit it hard enough it may result in an embarrassing attempt that ends up in the keeper’s arms.
Since it’s usually a split-second decision, players will often opt for a combination of power and accuracy before crossing their fingers that the ball ends up in the back of the net.
Step #5: Take a Touch
Whether crossing the ball or taking a shot, setting yourself up correctly is super important when you’re attempting to hit a moving ball.
If you have time, take a touch before striking the ball.
This will allow you to set it up at the perfect distance from you before running onto it.
Snatching at a shot will often result in a ballooned effort over the bar and strikes with the outside of the foot can go horribly wide without the proper run up.
Conclusion
Learning how to curve a soccer ball is a great skill to master as it gives you more passing and shooting options depending on what you want to accomplish during a match.
Whether you’re wanting to cross the ball in from a corner, curve it with the outside of your boot from a free kick, or attempting to nail a ball into the net on the move…
It’s a skill that all elite players work on.
There’s not denying that it will take a lot of hard work and practice to improve…
But if you want to learn how to curve a soccer ball like the professionals do, I recommend you get practicing sooner rather than later.

